Project link here:
http://www.rcgroups.com/forums/showthread.php?t=2583330
See post #2 for details on the chip swap.
I’m hoping for broader support of the F3 as a target in Arduino. It is pin compatible with F1, so it would be a straight forward change for the China board suppliers to swap chips on the mini dev board. It would open up high performance real time closed loop applications to low cost Arduino STM32 applications.
Thanks,
George
The official M3 support policy is: http://www.stm32duino.com/viewtopic.php?t=41
But after watching your video, I’m in the “wow mode” at your successful attempt at F3 transplant. I’ve done some work with my hot-air device and I’m a competent soldering person having my first soldering iron at age 11 to assemble a Knight Kit super-regenerative receiver. But I do not think I would tackle what you did. Congrats.
Maybe your callout for F3 Arduino support will inspire some of our members; who knows?
Ray
Great work. I didn’t know about the Chip Quick stuff. That was interesting in itself.
One thing you get that I noticed is a DAC on the 303, which the 103 didn’t have. I’m sure there are other differences. It would be great to see these come out using the same board.
Michael
Great work. I didn’t know about the Chip Quick stuff. That was interesting in itself.
One thing you get that I noticed is a DAC on the 303, which the 103 didn’t have. I’m sure there are other differences. It would be great to see these come out using the same board.
Michael
mrburnette wrote:@MGeo:
Maybe your callout for F3 Arduino support will inspire some of our members; who knows?
Ray
From Mouser.com
STM32F103C8: 2,500: $2.94
STM32F303CC: 2,500: $3.87
I’ve been looking at the STM32F4 Stamp that one guy came up with. He’s not making any more but the information is out there to make new boards. I’m sure it will cost me a lot more to make it but looks intriguing still. It’s based on the STM32F405. A big jump in power too.
I guess it comes down to if you need that kind of processing power is it worth the cost difference? For me anything under $20 is reasonable enough not to worry. But I’ve got enough keeping me busy right now. Not enough time to play with all my toys. ![]()
<…>
I’ve been looking at the STM32F4 Stamp that one guy came up with. He’s not making any more but the information is out there to make new boards. I’m sure it will cost me a lot more to make it but looks intriguing still. It’s based on the STM32F405. A big jump in power too.
The price point on the ESP32 will also be interesting, as currently the price / performance on the ESP8266 is quite compelling, to the point where its worth using purely as a MCU even if you don’t want WIFi.
Also, Nordic Semi have announced an updated Bluetooth Low Energy SoC to supersede the nRF51 series, called, not surprisingly the nRF52, which is cortex M3.
Im not sure on pricing, but I was buying nRF51 modules, for around $5, which have 256k flash and 16k ram, but the nRF51 only runs at 16MHz
So anyone wanting an MCU and BLE ….
Too many choices;-)
Have you all been following the new Nucleo boards, the Nucleo-32 series? Specific to this conversation would be the NUCLEO-F303K8. They are a small form factor and use the smaller 32pin chips but still have an onboard st-link v2:
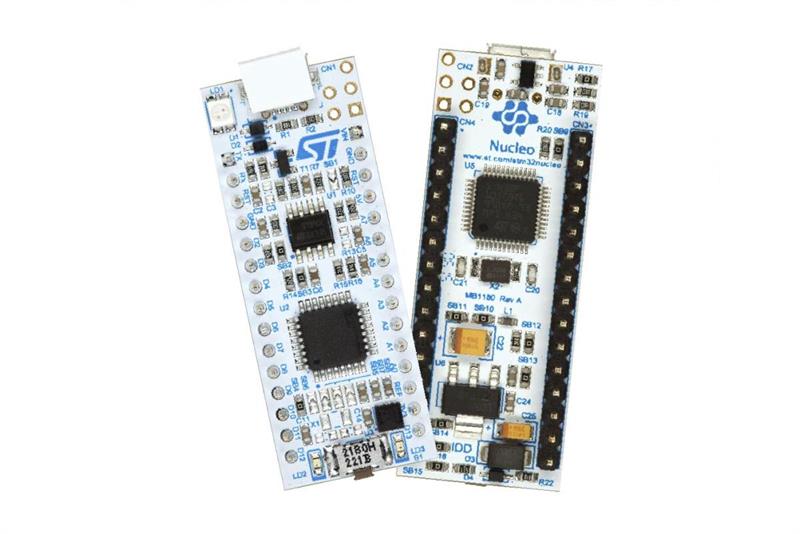
- Nucleo Development Boards for STs 32Pin STM32 MCUs_popup.jpg (45.63 KiB) Viewed 1839 times
That looks purdy.
Michael
STM32F103C8: 2,500: $2.94
STM32F303CC: 2,500: $3.87
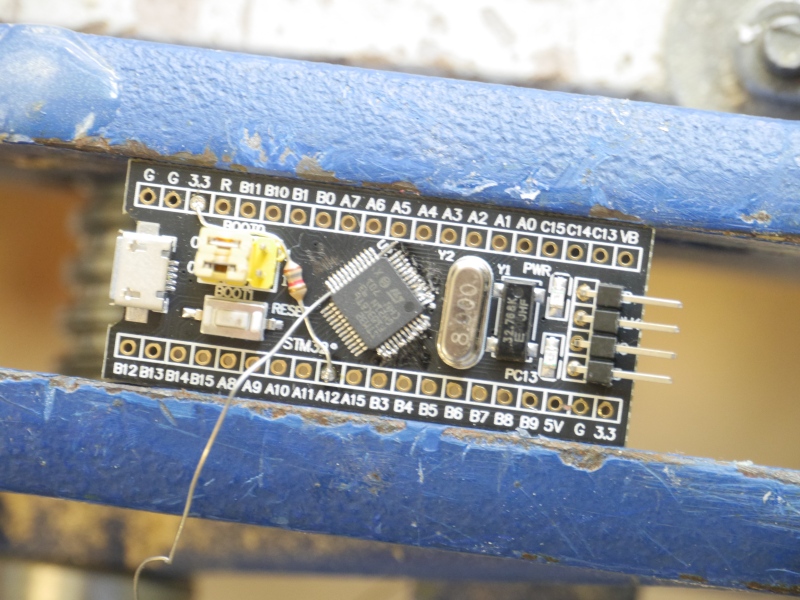
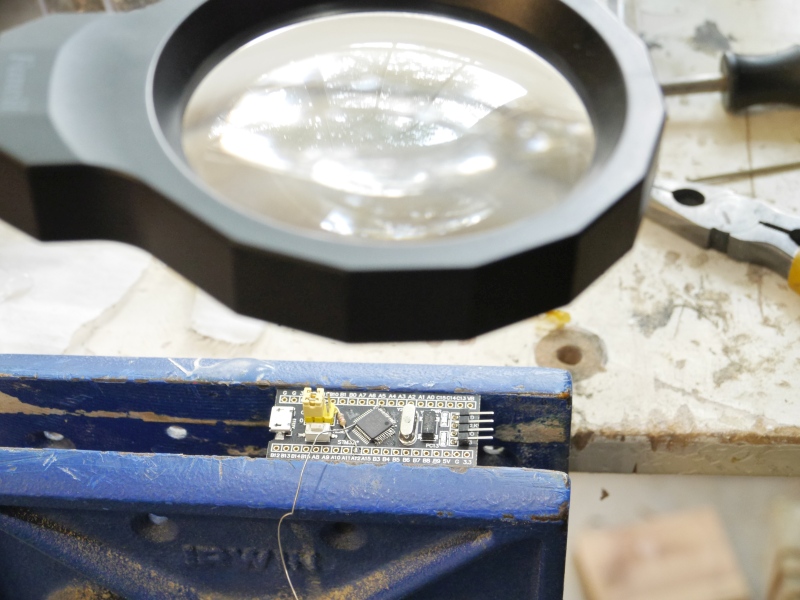
I just did a transplant of a F303CBT6 onto a maple mini board, and i just programmed it via an stlink v2, and it’s working XD. I’ve got blink running on it.
Where can i take this little board from here? Is there a bootloader so i could program it via the usb port?
Should i change some settings in the board files? (i’m atm just programming it as if it’s an STM32F3Discovery).
For now i’m pretty proud i made it this far already XD. this is the first serious SMD soldering i did (i ruined one board when trying to desolder using my soldering iron, then on the next board gave it a try with my heatgun, and that was a LOT easier (even though it’s a way too big heat gun that isn’t meant for SMD work XD)).
I wouln’t need 2500 pcs, never ever..
.. The point of the original post was to lobby for support of the F3 platform in the hope that demand might build. …
I have that F302 motor kit and Nucleo board as well, I’ll have to explore when I get a chance.
George
Jonas
ST-Link work …
It uses the Standard Peripheral Library and is constructed in totally a totally different way to Libmaple.
I think STM also intend to bring out their own core for the Nucleo F3, but its a long way down their To Do list, so I dont think its likely to be released any time soon.
I just did a transplant of a F303CBT6 onto a maple mini board, and i just programmed it via an stlink v2, and it’s working XD. I’ve got blink running on it.
Where can i take this little board from here? Is there a bootloader so i could program it via the usb port?
Should i change some settings in the board files? (i’m atm just programming it as if it’s an STM32F3Discovery).
For now i’m pretty proud i made it this far already XD. this is the first serious SMD soldering i did (i ruined one board when trying to desolder using my soldering iron, then on the next board gave it a try with my heatgun, and that was a LOT easier (even though it’s a way too big heat gun that isn’t meant for SMD work XD)).
[victor_pv – Sat May 20, 2017 10:15 pm] – I loaded the bootloader for the bluepill
What tool did you use for this?
Does the stm32f3 use the same serial protocol as the stm32f1? I did a transplant myself just now, but the STM Flash Demonstrator doesn’t recognize the patient.
The re-soldering was actually pretty easy.
0. Make a note of where the alignment dot on the IC is.
1. Clamp pill in vise.
2. Thread an old guitar string (=strong thin steel wire) near one side of the IC under the legs.
3. Hold guitar string with one hand and start heating the legs starting on the side where the hand is. Gently use the guitar string to pry the legs off. Repeat until side is done.
4. Repeat 2-3 for the other two sides.
5. Clean up a bit with desoldering braid. But not too much: you want to keep solder on the pads, just smooth it out.
6. Put new chip where it belongs, remembering where the alignment dot was. Align carefully with pads. This is actually rather hard. I used tweezers.
7. Gently touch a hot fine solder tip to a corner leg for 3-4 seconds. And then another, ideally (I can’t remember).
8. Repeat for other legs.
9. Check for shorts. I had one, which I fixed by cutting with an Xacto knife.
Besides the one short, I had one other problem: I wasn’t careful enough at step 3, and two legs pulled up parts of the traces. I ended putting drops of solder paste on the remaining bits of the traces hope things would join up and bridge, and it seemed to work out.
Oh, and the guitar string technique (which I saw mentioned somewhere online) bent the legs of the original F103, so it’s probably useless now.
This is only my second time ever doing surface mount soldering, and the pitch was much finer this time. My fine motor skills are pretty average, I think.
I tried to use a reflow tool to remove the whole IC but ended up pulling a track off the PCB, because one of the pins was not fully unsoldered.
I use the Xacto knife to cut all of the IC pins near the ceramic side. After cutting all of then, just remove the center and then, with the soldering iron remove all of the pins left on the PCB.
This method is not so prone to damage on the pads or on the traces of the PCB.
A very happy thing: The built-in usb bootloader on the chip works fine with dfu-util for USB uploading. I had to install the zadik usb-libk driver for win64 and I do have to move the BOOT0 jumper to flash code, though.
The “sort of” is due to the delay()-based blink rate not being right. It’s too slow by about a factor of 8. I also tried using asm(“nop”) for delay, and it was also off by a similar amount. Adding some test code to the init code shows that the HSE is failing to start up, and so the chip is for some reason running at around 8-9 MHz. Any thoughts on why it might be doing that?
If anybody wants to try out stm32f303cb (128k flash) or stm32f303cc (256k flash), here’s my fork of Koduino: https://github.com/arpruss/koduino
USB Serial works fine with my fork. Just do:
#include <SerialUSBClass.h>

...

setup() {

delay(200);

Serial.begin(115200, 0xff);

}

