Spark Logic

STM32F303CC on Cheap Mini Dev Board: Support for SMT32F3

MGeo Wed Feb 03, 2016 10:02 am

I have a project where I have converted the low cost STM32F103C8 based mini development board to an STM32F303CC board. The extra performance of the F3 and its FPU were needed here for real time PID control purposes. The conversion was straight forward chip swap although I found it pushed my soldering skills some. The cost impact to the BOM is about $0.50 extra in quantity for the F3. In exchange you get an FPU and way more flash.

Project link here:
http://www.rcgroups.com/forums/showthread.php?t=2583330
See post #2 for details on the chip swap.

I’m hoping for broader support of the F3 as a target in Arduino. It is pin compatible with F1, so it would be a straight forward change for the China board suppliers to swap chips on the mini dev board. It would open up high performance real time closed loop applications to low cost Arduino STM32 applications.

Thanks,
George

Replies

victor_pv Sat May 20, 2017 10:15 pm

racemaniac wrote:Wahoo :)
I just did a transplant of a F303CBT6 onto a maple mini board, and i just programmed it via an stlink v2, and it’s working XD. I’ve got blink running on it. :D.

Where can i take this little board from here? Is there a bootloader so i could program it via the usb port?
Should i change some settings in the board files? (i’m atm just programming it as if it’s an STM32F3Discovery).

For now i’m pretty proud i made it this far already XD. this is the first serious SMD soldering i did (i ruined one board when trying to desolder using my soldering iron, then on the next board gave it a try with my heatgun, and that was a LOT easier (even though it’s a way too big heat gun that isn’t meant for SMD work XD)).

arpruss Sun May 13, 2018 10:00 pm

[victor_pv – Sat May 20, 2017 10:15 pm] – I loaded the bootloader for the bluepill

What tool did you use for this?

Does the stm32f3 use the same serial protocol as the stm32f1? I did a transplant myself just now, but the STM Flash Demonstrator doesn’t recognize the patient.

RogerClark Sun May 13, 2018 11:52 pm

I’m not aware of the F1 bootloader working on the F3.

arpruss Mon May 14, 2018 2:00 am

I know the bootloader won’t work, but I’m wondering if the stm flash tool does.

arpruss Mon May 14, 2018 3:57 am

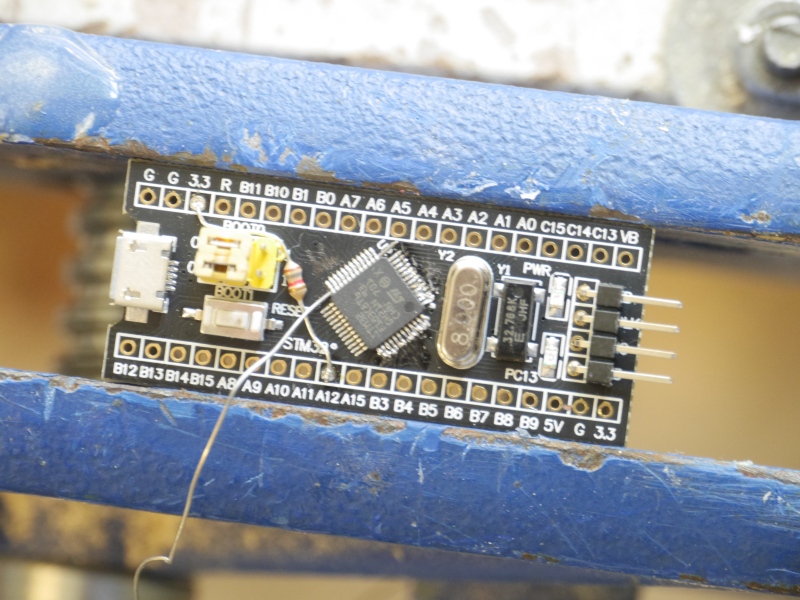
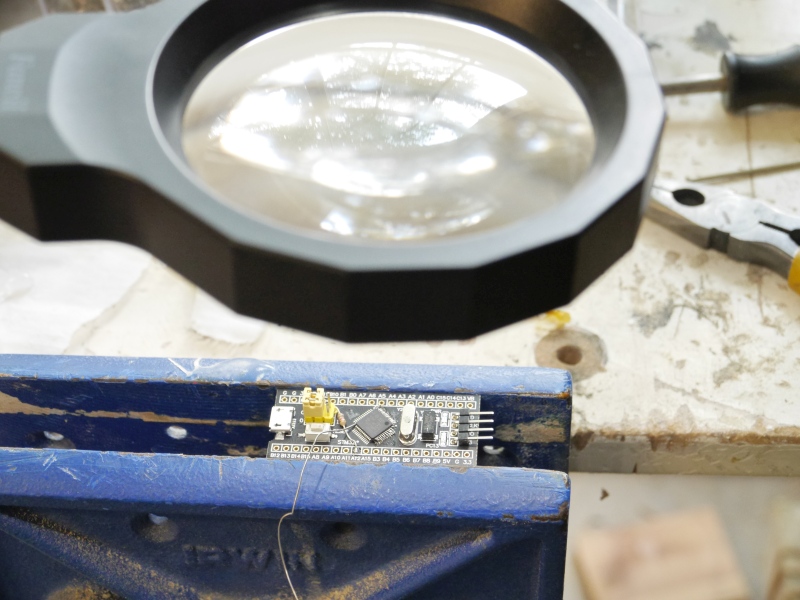
OK, I figured out my problem with serial connections. I was powering the frankenpill via a laptop USB port. But that resulted in the F3 going into USB DFU mode (which enumerated correctly, but I never noticed), and the serial upload getting disabled. When I powered it from a wall charger, the serial showed up just fine.

The re-soldering was actually pretty easy.

0. Make a note of where the alignment dot on the IC is.
1. Clamp pill in vise.
2. Thread an old guitar string (=strong thin steel wire) near one side of the IC under the legs.
3. Hold guitar string with one hand and start heating the legs starting on the side where the hand is. Gently use the guitar string to pry the legs off. Repeat until side is done.
4. Repeat 2-3 for the other two sides.
5. Clean up a bit with desoldering braid. But not too much: you want to keep solder on the pads, just smooth it out.
6. Put new chip where it belongs, remembering where the alignment dot was. Align carefully with pads. This is actually rather hard. I used tweezers.
7. Gently touch a hot fine solder tip to a corner leg for 3-4 seconds. And then another, ideally (I can’t remember).
8. Repeat for other legs.
9. Check for shorts. I had one, which I fixed by cutting with an Xacto knife.

Besides the one short, I had one other problem: I wasn’t careful enough at step 3, and two legs pulled up parts of the traces. I ended putting drops of solder paste on the remaining bits of the traces hope things would join up and bridge, and it seemed to work out.

Oh, and the guitar string technique (which I saw mentioned somewhere online) bent the legs of the original F103, so it’s probably useless now.

This is only my second time ever doing surface mount soldering, and the pitch was much finer this time. My fine motor skills are pretty average, I think.

Image

Image

RogerClark Mon May 14, 2018 6:49 am

Thats an interesting technique

I tried to use a reflow tool to remove the whole IC but ended up pulling a track off the PCB, because one of the pins was not fully unsoldered.

rexnanet Mon May 14, 2018 9:19 am

My approach is a bit more destructive for the “old” IC but cleaner for the PCB.

I use the Xacto knife to cut all of the IC pins near the ceramic side. After cutting all of then, just remove the center and then, with the soldering iron remove all of the pins left on the PCB.
This method is not so prone to damage on the pads or on the traces of the PCB.

arpruss Mon May 14, 2018 3:19 pm

I’ve sort of got a blinky working with Koduino, after modifying Koduino’s f303v variant to have 128K flash / 32K ram (I am using the stm32f303cbt6).

A very happy thing: The built-in usb bootloader on the chip works fine with dfu-util for USB uploading. I had to install the zadik usb-libk driver for win64 and I do have to move the BOOT0 jumper to flash code, though.

The “sort of” is due to the delay()-based blink rate not being right. It’s too slow by about a factor of 8. I also tried using asm(“nop”) for delay, and it was also off by a similar amount. Adding some test code to the init code shows that the HSE is failing to start up, and so the chip is for some reason running at around 8-9 MHz. Any thoughts on why it might be doing that?

arpruss Mon May 14, 2018 6:16 pm

My oscilloscope registers nothing across the 8MHz crystal’s pins.

arpruss Tue May 15, 2018 3:21 am

Problem fixed: had to remove HSEBYP bit from RCC settings.

If anybody wants to try out stm32f303cb (128k flash) or stm32f303cc (256k flash), here’s my fork of Koduino: https://github.com/arpruss/koduino

USB Serial works fine with my fork. Just do:
#include <SerialUSBClass.h>
...
setup() {
delay(200);
Serial.begin(115200, 0xff);
}

victor_pv Thu May 17, 2018 6:43 pm

I used and stlink clone to load the bootloader. As mentioned the bootloader starts running and crash. I am sure the bootloader could be made compatible, but I just wanted to run some BIN to make sure the MCU was running (xtal pins, internal PLL, etc).

RogerClark Thu May 17, 2018 9:44 pm

You could try the new HID bootloader that @bootsector wrote and which Vassilis has been improving .

Sign in to reply