I was fooling around with the included adafruit ili9341-STM32 library, thinking it should be possible to use some bmp images directly from flash.
I found this: http://www.instructables.com/id/Arduino … rom-FLASH/
So I ported some of the new functions (push_colors array) into our lib and wrote two little examples:
“animation” and “ILI9341_draw_FLASH_bmp”
With this addon it’s easy to setup a little image/s directly from flash. The images can also be a smaller size, for example 20×20 pixels not only fullscreen. Ideal for some animated buttons, sliders… whatever.
Feel free to download it (you must replace the whole library)
edit: file corrected!
https://drive.google.com/file/d/0B3sgtw … sp=sharing
As converter tool I use the UTFT one:
online: http://www.rinkydinkelectronics.com/t_i … ter565.php
or offline (with the big advantage that you can use the “chipkit” output, so you wont have to convert the variables) I think this windows only program (ImageConverter565.exe) is included in every UTFT lib (I have it about 10 times on my computer)
Thanks for the additions. It will definitely come handy.
Does the BMP need to be in the size of the screen, or is resized on the fly?
to your questions:
Does the BMP need to be in the size of the screen, or is resized on the fly?
Currently the BMP must be in size.
About size of images:
Example: I use a BMP with 160×120 pixels, size: 38.400 bytes, so the minimal test sketch uses 80,372 bytes (65%) of program storage space on my maple mini. So images with 320×240 (full screen) are impossible.
Additional info
The “pushColors” function is overloaded, so maybe it’s better to use only 8-bit color for larger images (didn’t tried it – I’ve doubt about the correct implementation of mine)
pushColors(uint16_t *data, uint8_t len),
pushColors(uint8_t *data, uint8_t len),
Warning: To avoid problems with larger pics you have to use following:
void drawIcon(const unsigned short* icon, int16_t x, int16_t y, int16_t width, int16_t height)
instead of:
void drawIcon(const unsigned short* icon, int16_t x, int16_t y, int8_t width, int8_t height)
The pushColors function should be easy to implement into other graphic libraries we use (example: TFT_ILI9163C)
…but the correct code would be:
    *dcport |=  dcpinmask;

*csport &= ~cspinmask;

SPI.setDataSize (SPI_CR1_DFF); // Set SPI 16bit mode

SPI.dmaSend(data, len, 1);

SPI.setDataSize (0);

*csport |= cspinmask;
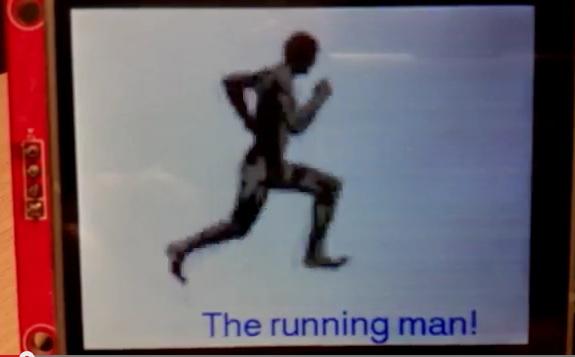
http://youtu.be/bv_LYtYQCmk
sketch uses about 95% of flash :/
scale factor for image: 3x
…but the correct code would be:
    *dcport |=  dcpinmask;

*csport &= ~cspinmask;

SPI.setDataSize (SPI_CR1_DFF); // Set SPI 16bit mode

SPI.dmaSend(data, len, 1);

SPI.setDataSize (0);

*csport |= cspinmask;
 x2
x2
Andy, maybe consider VTOP… Vertical TakeOff Pig
Ray
Andy, maybe consider VTOP… Vertical TakeOff Pig
Ray
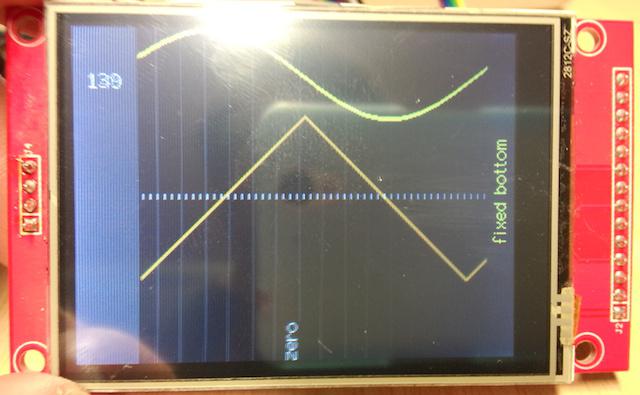
Please keep in mind, that HW scrolling has some rules and restrictions, they are not really optimal for us (example: pig-o-scope):
so in landscape mode only left-right scrolling is possible and there are two possible fixed areas (left and right)
in portrait mode only up-down scrolling is possible, the fixed areas are on the top and/or bottom
sorry: pics and video have too much reflections, code is as attachement .
Some infos how I’ve done it:
on x-position 0 at the scroll area there is always a fast-v-line (black) so the everything on this position is deleted and wont show up on the right side again.
Drawing is from the last x-position of the scroll area: here I drop the points for sinus, tri, and dotted center line.
As you can guess sticky vertical lines (or even worse: text) is complicated and uses a lot of calculation and redrawing (so CPU time).
I tripled the output lines for a better video result
VIDEO:
http://youtu.be/Z422TePxstA
What I mean:
in landscape mode you can scroll left OR right
in portrait mode you can scroll up OR down
Please take this code (attached)
