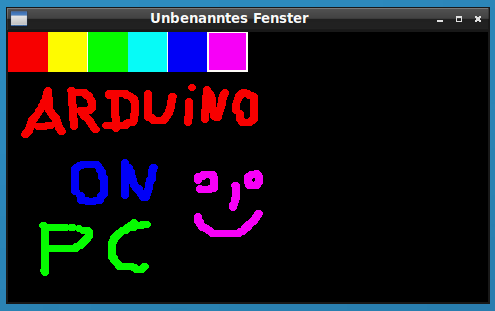
At first I ported Adafruit_GFX to the framework so I can use the common TFT functions to draw on my desktop screen.
There is also a touch-screen simulation with the mouse.
Could that be of interest for someone?
The source code is here
How would that work?
If you are familiar with Eclipse, it is quite easy to use.
if you added in spi, i2c, … … who needs a Pill or MM
Thanks!
Let me know, if it compiles without problems on your Eclipses.
I named the Arduino example sketches *_ino.h because it seems to be the easiest to have a sketch file without any overhead.
At the moment the sketch to be compiled is selected with the “#include” in main.cpp.
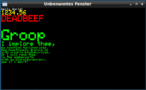
It looks exactly like the Adafruit picutres
When you compile the project “TFT_demo_ino.h” is the default sketch. So you will see directly the graphicstest.
I have implemented millis and delay where as delay seems to work proper.
+1
if you added in spi, i2c, … … who needs a Pill or MM
Probably it would be good to combine the simulator ( or is it more an emulation ? ) with wiringPi than the HDMI screen can be used as TFT display ![]()
[ChrisMicro – Sat Jul 08, 2017 8:52 am] –
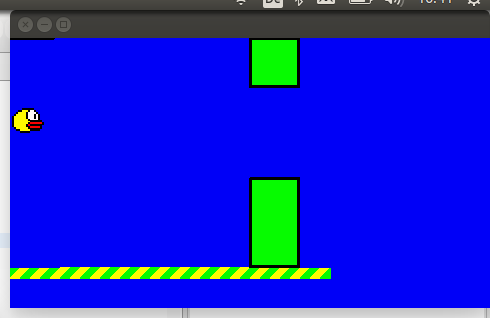
Here is a picture of the Flappy game which I use as a benchmark ( and is running in my Linux simulator ).
I have implemented millis and delay where as delay seems to work proper.
Did you make it?
You can try to run it in the emulator, if you have Linux and eclipse.
I think it should be easy to port, because I just made wrappers for the Adafruit touchpaint example and imported it into the repo.
The only modification is the include at the beginning of the file.
Btw, i use only windows, but i know Eclipse.
Anyway, I have added the “howto in the readme”
This also came to my mind but I’m not sure if Eclipse-CDT for windows is directly integrating the gcc and cygwin.
I use to computers: A fast one with Win10 and a VM with XuBuntu where I started to develop this project.
The other one is a very slow 1.8GHz Laptop with Ubuntu
On the Win10 Laptop with the VM the Flappy-example is running very fluently. On the slow one it is also running but not as nice as in the VM under Win10.
A little bit about the software structure of the project:
The main interface to the PC is inside the file “posixWrapper.c”. There is the PC-timer access for mills() and delay() and also the basic drawing functions for the X11 window.
The posixWrapper.c file is used by the TFT_LinuxWrapper.h file which is a derivative of the Adafruit_GFX class.
Due to providing the missing virtual functions for the Aadfruit_GFX now all the Adafruit_GFX functionality can be used with the TFT_LinuxWrapper class.
But I never used C++ or C with any GUI so I am not able to do that.
[ChrisMicro – Sun Jul 09, 2017 5:34 pm] –
A little bit about the software structure of the project:
The main interface to the PC is inside the file “posixWrapper.c”. There is the PC-timer access for mills() and delay() and also the basic drawing functions for the X11 window.
The posixWrapper.c file is used by the TFT_LinuxWrapper.h file which is a derivative of the Adafruit_GFX class.
Due to providing the missing virtual functions for the Aadfruit_GFX now all the Adafruit_GFX functionality can be used with the TFT_LinuxWrapper class.
I’m amazed, works almost instantly out of the box on a VM! ![]()
Thanks for the howto as well, it makes it easy to start with!
So generic Arduino functions are not included yet, which is not a big deal if it would be clear how to add them on demand. Could you post a bit of information or guide how this emulator could be extended where needed?
Just the possibility to debug and step through code is already such a great use case!
Thanks!
Hi universam10,
thank you very much for testing it ![]()
So generic Arduino functions are not included yet, which is not a big deal if it would be clear how to add them on demand. Could you post a bit of information or guide how this emulator could be extended where needed?
At the moment only very basic functions are implemented.
E.g. Serial is implemented and Serial.print goes to the PC console output which is also useful for debugging.
digitalWrite … analogWrite is missing yet, but it could just be added quite easily by putting them into the folder
cores/arduino
and adding the header file to Arduino.h.
I just tried to keep the folder structure like the real Arduino.
What is the call hierarchy?
All available Arduino functions are include with “Arduino.h” which is included in main.cpp before including the sketch file ( e.g. blink.ino ).
I just copied some basic Arduino Routines form STM32GENERIC into cores/arduino
I think I will try to comment the code a little bit better to make it more understandable.
If you have any questions don’t hesitate to ask ![]()
Yes, I read the code so maybe will be better to use some graphic libraries that do the same instead of using CigWin.
But I never used C++ or C with any GUI so I am not able to do that.
I didn’t use a graphics library because this is a kind of “learning project” for me where I try to improve my C++ knowledge.
It would have been possible to use Qt for instance but I wanted to do my own graphics routines from scratch.
Meanwhile I have added the “Blink.ino” to the project.
It is a good example on “HowTo” add new functionality.
What I had to do:
1. add the Arduino file “wiring_digital” as *.cpp file to the repo.
( you will instantly understand what it does when looking at the code )
2. add the function templates in “Arduino.h”
3. add the “Blink.ino” in the examples folder and change the include in “main.cpp”
Btw.: who whants to go deeper, here is a very interesting article about the history of “wiring”.
Nice, now it makes sense.
How did you solve to be able to step through the code? Since .ino is not recognized as cpp file it is not available to step through, but if I declare .ino as cpp file then it won’t compile. Do you have an idea regarding this?
Thanks and keep on that cool idea!
e.g. instead of Blink.ino it may be Blink.h
Probably this may help for debugging.
