Based on my experience with the F103 decided to go further and try to use the L476RG in a new project.
My idea is to use it to record audio from an analog input at a relative low sample rate (1kHz) to a microsd card during a fixed period of time and been sleep all the other period they claim it as the better lowpower options and would like to know how to implement it.
After being search the last day and could not found any project so simple decide to post here my questions.
First, does anyone have already develop such a simple solution?
Read an analog to a buffer and record it to an sd is a simple task but using DMA I have no idea how to do it can someone explain it to me?
The other problem I am facing is the format, in another audio projects the file is recorded in raw format, so then converted using audacity.
What should be converted and how to a raw format in order to use it latter?
Thanks all for your time.
All the best,
Tim
It seems that you can’t use DMA for SD writing.
Maybe this can be useful
https://www.stm32duino.com/viewtopic.php?f=3&t=1453
I used this library
https://github.com/TMRh20/TMRpcm
with Arduino and it’s capable of recording a wav (remember to enable recording!).
If you want to record as raw simply put on SD all samples as two bytes integer, then read it on Audacity telling it that the format is raw, 16 bit unsigned, 1KHz sampling rate. You also have to tell if it is big or little endian, maybe analyzing the file with an hex editor.
Thanks for your reply.
The idea of using DMA was to store the acquisitions on a buffer to then transfer to the sd later, not used simultaneous.
Remember the propose it to use the L476RG that have a huge flash for the buffer would be more than ok.
Was already reading this: https://www.stm32duino.com/viewtopic.php?f=3&t=1453 and now need to explore the solution.
Did not understand how to use the library (https://github.com/TMRh20/TMRpcm) to record, did not found the record enable option?!
Can you explain please?
If you want to record as raw simply put on SD all samples as two bytes integer, then read it on Audacity telling it that the format is raw, 16 bit unsigned, 1KHz sampling rate. You also have to tell if it is big or little endian, maybe analyzing the file with an hex editor.
That is the original idea, but do not know what format of data to send the sd and if need a space between values or comma, could you give me some clues?
Thanks for your help.
All the best,
Tim
In my application (an audio sample project here: https://github.com/stevstrong/Audio-sam … C_Host.ino) I stored data on SD in raw format and sent the data later to PC over serial.
Basically you have to allocate a huge buffer in RAM to store the audio samples.
Then, when the DMA buffer is half full, you transfer the data to SD. When DMA buffer is complete, you transfer the rest of data to SD.
Thanks for your reply!
My idea is to record data on a SD card as raw to later open it in audacity. The problem here is that I do not know what format and file organize to do it…
Try to use your application but got this error:
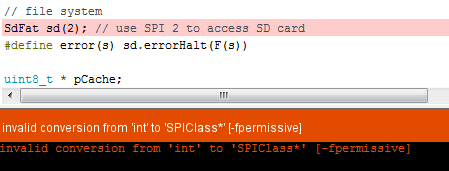
- error_recorder.PNG (9.36 KiB) Viewed 364 times
Found the problem for the code:
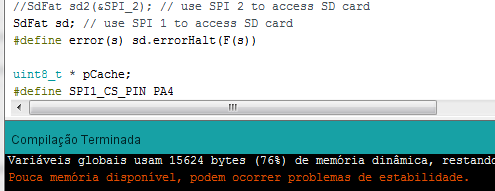
- error_repair.PNG (13.26 KiB) Viewed 362 times
Have found the record enable!
It as to be done in the pcmConfig.h by uncoment the referent line.
But do not know how to call it properly…
In the TMRpcm.cpp file I can see the instruction but when call it did not work.
Can you send me the command you use to start and stop?
Is it possible to use the STM32 also?
Thanks
All the best,
Tim
This one. Never tested on a STM32. Remember that you have to use a MIC with a decent amplifier like the cheap ones that use a MAX amplifier otherwise you will get only noise. Using MAX you will get noise but not ONLY noise!
/*

WavRecAndPlay was Recording example of TRMpcm library
This sketch demonstrates recording of standard WAV files that can be played on any device that supports WAVs. The recording
uses a single ended input from any of the analog input pins. Uses AVCC (5V) reference currently.
Requirements:
Class 4 or 6 SD Card
Audio Input Device (Microphone, etc)
Arduino Uno,Nano, Mega, etc.
Steps:
1. Edit pcmConfig.h
a: On Uno or non-mega boards, #define buffSize 128. May need to increase.
b: Uncomment #define ENABLE_RECORDING and #define BLOCK_COUNT 10000UL
2. Usage is as below. See https://github.com/TMRh20/TMRpcm/wiki/Advanced-Features#wiki-recording-audio for
additional informaiton.
Notes: Recording will not work in Multi Mode.
Performance is very dependant on SD write speed, and memory used.
Better performance may be seen using the SdFat library. See included example for usage.
Running the Arduino from a battery or filtered power supply will reduce noise.
*/
#include <SD.h>
//#include <SdFat.h>
#include <SPI.h>
#include "TMRpcm.h"
//#define SD_ChipSelectPin 53 //example uses hardware SS pin 53 on Mega2560
#define SD_ChipSelectPin 4 //using digital pin 4 on arduino nano 328, can use other pins
TMRpcm audio; // create an object for use in this sketch
void setup() {
audio.speakerPin = 9; //5,6,11 or 46 on Mega, 9 on Uno, Nano, etc
pinMode(10, OUTPUT); //Pin pairs: 9,10 Mega: 5-2,6-7,11-12,46-45
Serial.begin(115200);
if (!SD.begin(SD_ChipSelectPin)) {
return;
} else {
Serial.println("SD OK");
}
// The audio library needs to know which CS pin to use for recording
audio.CSPin = SD_ChipSelectPin;
}
void loop() {
if (Serial.available()) { //Send commands over serial to play
switch (Serial.read()) {
case 'r': audio.startRecording("test.wav", 16000, A0); break; //Record at 16khz sample rate on pin A0
case 'R': audio.startRecording("test.wav", 16000, A0, 1); break; //Record, but with passthrough to speaker.
case 't': audio.startRecording("test.wav", 16000, A0, 2); break; //Do not record. Output direct to speaker
//Note: If samples are dropped before writing, it
// will not be heard in passthrough mode
case 's': audio.stopRecording("test.wav"); break; //Stop recording
case 'p': audio.play("test.wav"); break; //Play the recording
case '=': audio.volume(1); break; //Increase volume by 1. Does not affect recording
case '-': audio.volume(0); break; //Decrease volume by 1. Does not affect recording
case 'S': audio.stopPlayback(); break; //Stop all playback
}
}
}
Thanks for the reply.
Will give it a try this weekend.
It would be nice if someone has a working version for STM32.
Tim
So anyway, I recently did a project with SD Card sharing the same SPI as an external SRAM (1Mbit to buffer) and it works fine as long as the calls are separate.. The SD Card best runs with a 512 byte buffer
Google wave file format. You have to define that the wav is mono, uses (16 bits), data block size (that needs to be an edit of the SD file post recording), sample rate + others, and follows the little endian format for data
The layout as “RIFF” “fmt” and “data” is fairly specific to be recognized by any Player
I was looking at the library and it appears that a wave file header can be created but couldn’t figure out how the size is inserted but there’s commented print”size” in the header section. I’m not good at reading libraries though so probably missed it.
But even with RAW format that’s pretty impressive for an ATMEGA!


